|
Home
Recent Images
Galaxies
Nebulae
Natural Color
Narrow Band
H-Alpha
Clusters
Comets
Solar System
Observatory
Equipment
My Freeware
Tips & Tricks
Published Images
Local Weather
Send Email
|
Background Repair w/ PhotoShop
|
Sometimes we get an image
with a problematic background. The following process is not for the
faint of heart purest. However, there are times when we may want to
simply replace the entire background with an artificial one. As a last
gasp effort, this can save an image that is doomed for the Recycle Bin. |
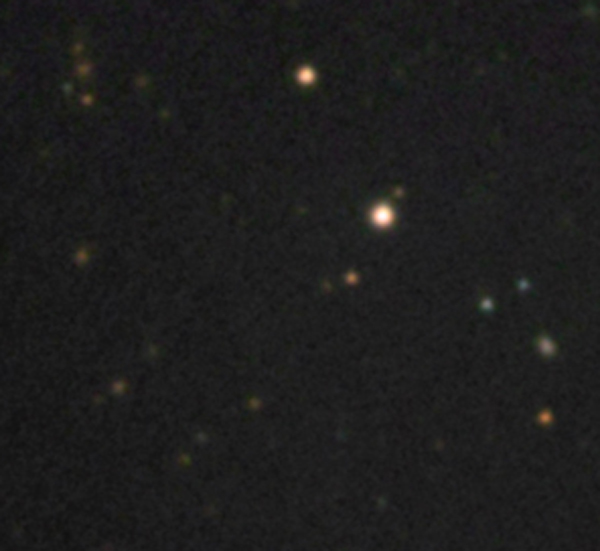
Image 1
| Image 1 is our
starting point. The image has a noisy, uneven background, but also shows some
faint galaxies. The following steps will make the background
smoother with little or no loss of faint galaxies. |

Figure 2
-
Load your image into PhotoShop.
-
Use the Eyedropper to select the background color.
-
Use Ctrl-A, Ctrl-C to copy the image to the clipboard.
-
Use File|New to create a new image. I have PhotoShop set to
automatically use the image, on the clipboard, for setting the
height and width.
-
Select and set the Paint Bucket Tool (PBT) opacity to 100% and the
Tolerance to zero. Now use the PBT to paint the image with the
previously selected background color.
-
Image 2 shows the new
artificial
background
|
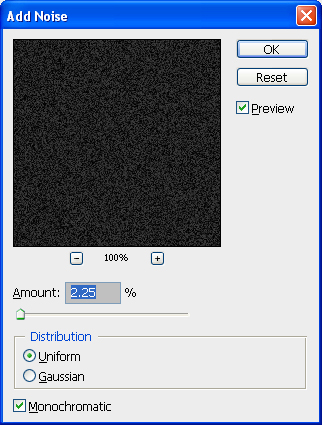
Image 3
The problem with the
new background is that it is perfectly smooth. So, it is necessary
to add some noise to make it look natural. However, the added noise will
be at a lower level than the original image.
Use the Noise Tool, as shown in Image 3, to add noise to the artificial
background. Try levels from about 1.5 to 2.5. Also, try experimenting
with the Uniform or Gaussian distribution. Sometimes it is useful to
uncheck Monochromatic and use a background with random color noise. |
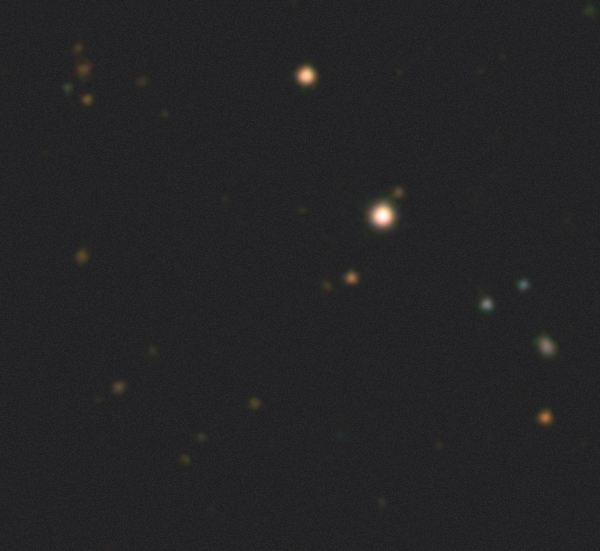
Image 4
|
Now we
will add our new background to the original image, see Image 4.
-
Use Ctrl-A, Ctrl-C to
copy the new background to the clipboard.
-
Select the original
image and use Ctrl-V to paste in the contents of the clipboard, as a
new layer.
-
Set the blend mode for
layer one to Lighten.
|

Image 5

Now, in Image 4, we
have a perfectly flat low noise background. However, it is too bright and a covers the faint galaxies. Adjusting the brightness of
Layer 1 repairs this.
Simply use the Brightness/Contrast tool to adjust the brightness so that
the faint background galaxies start to disappear. With careful
adjustment it should be possible improve the background with little or
no loss of faint detail... see Image 5.
Finally, flatten the image. Roll the mouse in an out of Image 5 to see
the before and after result. |
|