|
Home
Recent Images
Galaxies
Nebulae
Natural Color
Narrow Band
H-Alpha
Clusters
Comets
Solar System
Observatory
Equipment
My Freeware
Tips & Tricks
Published Images
Local Weather
Send Email
|
Hubble Palette Color Map Images w/ PhotoShop
|
Although this tutorial
uses PhotoShop, this technique will work with any image processor that
can create an RGB image using a separate gray scale image for each color
channel.
This
tutorial shows specific color adjustments, using PhotoShop's Selective
Color tool. The reader is encouraged to experiment with all adjustment
combinations. With a little practice it will become easy to take the
color in any desired direction. Don't forget to try the
Hue/Saturation tool and adjusting the brightness curve for each color
channel.
|
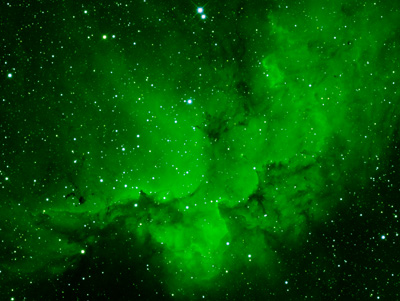
Image 1
|
|
|
Image 1 was created by
mapping the SII, Ha and OIII data respectively to the R, G and B
channels. The resulting RGB image was stretched to show the faint detail
and gives a wonderful display of the extent of hydrogen, in the area of
NGC7830.
However, due to its dominance, all we see is the hydrogen. By
manipulating the colors, we can show the SII and OIII areas. This
creates a much more interesting image and we can also do a bit of
science. So let's get to it.
|
*****************
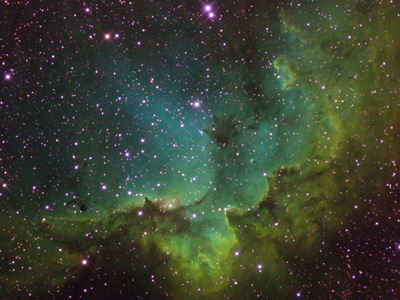
Image 2
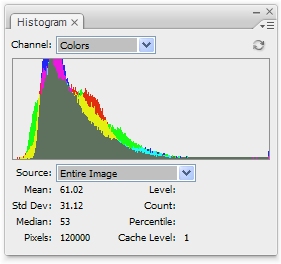
Fig. 1
Iimage 2 is what I
generally call my Base Hubble Palette image. I usually manipulate the
color of this image to produce other motif's, such a the popular gold
and turquoise combination. This image is created by first stretching the SII, Ha and OIII
images so their levels from dark to bright are similar... as shown in
the above histograms in Fig 1.
Now create an RGB image with SII mapped to red, Ha to green and OIII to
the blue channel and you should get something similar to Image 2. While
this image does not represent the correct balance of sulfur, hydrogen
and oxygen, we can plainly pick out the presence of the three elements.
|
*****************
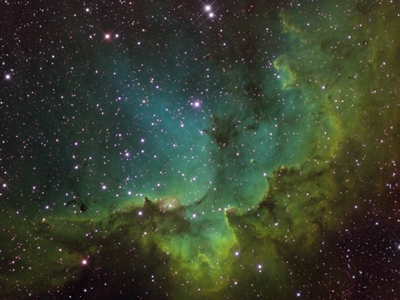
Image 3
|
Image 3
is the final result, after a few tweaks.
-
The
color in the stars was reduced by setting Photoshop's Reduce Color
Noise slider to 100%.
-
The Hue/Saturation
tool was used to further reduce the saturation of the Magenta. We
can do this with this image because most of the magenta is only in
the stars.
-
Finally,
the stars were dimmed to put more emphases on the nebula.
|
| The following steps
show how to convert the Base image into the gold and turquoise motif. |
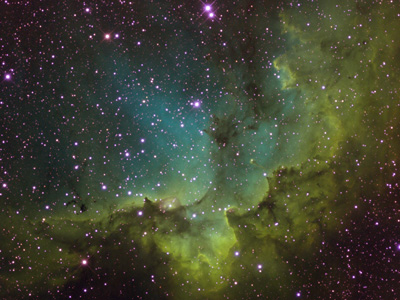
Image 4
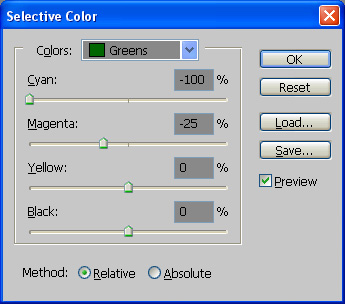
Fig. 2
| First, the Selective
Color tool was used to change the green pretty much to yellow, by
reducing the cyan and magenta from the green data as shown in Image 4. See the above
Selective Color settings in Fig 2. |
*****************
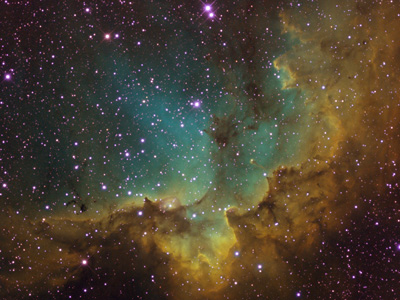
Image 5
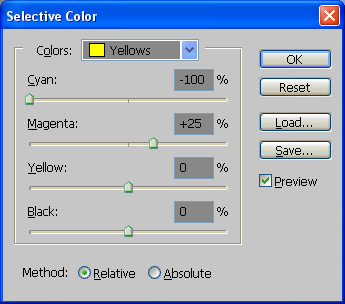
Fig. 3
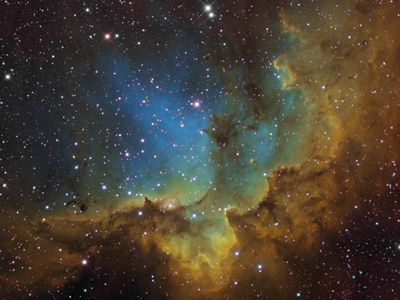
| Image 5 shows the
dramatic change to the gold and turquoise motif. The Selective Color
tool was used to adjust the Yellow. Figure 3 show the adjustments, using
the Cyan and Magenta sliders. |
*****************
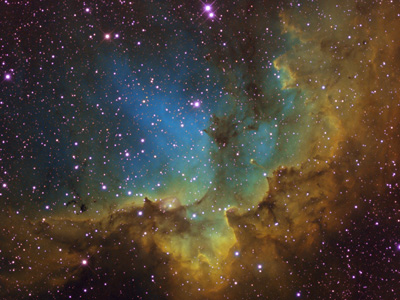
Image 6
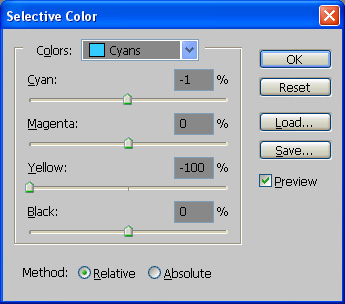
Fig. 4
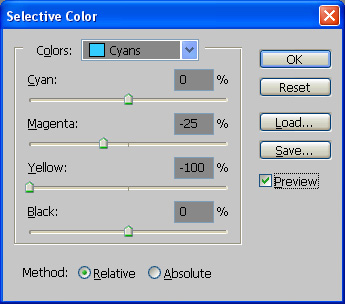
Fig. 5
| The final two color
adjustments are made with two consecutive changes to the cyan data, as
shown in figures four and five. First the cyan was shifted towards the
blue by removing yellow. Next, the cyan was enhanced by reducing both
the magenta and yellow. See Image 6 for the result. |
*****************
| Finally, the earlier
touch up tweaks were applied to remove the magenta from the stars and
the stars were dimmed. |
|