|
Home
Recent Images
Galaxies
Nebulae
Natural Color
Narrow Band
H-Alpha
Clusters
Comets
Solar System
Observatory
Equipment
My Freeware
Tips & Tricks
Published Images
Local Weather
Terrestrial
Send Email
|
How Sub Exposure Normalization Can
Affect Color Balance
|
With calibrated red, green and blue sub exposures, taken under ideal
conditions, the final RGB image should have good color. In reality, the
conditions are never ideal. This is especially true when data are
required over multiple nights. The overall intensity of individual
exposures will vary. This is why we normalize the data.
Normalizing the sub exposures compensates for variations in sky
background and transparency. This allows data rejection routines to
better remove outlier pixel values and undesired artifacts. Normalized
data produce a better result when the image stack is mean combined.
For proper normalization, it is important to select the best reference
image for each color filter. This test shows how changing the reference
image can affect the overall color balance. Additionally, the test shows
that eXcalibrator will correct the color balance in
the case of a poor
normalization choice.
In the following "real-world" test, the sub exposures very greatly. The
red, green and blue image stacks were normalized with CCDStack. I used
CCDStack's Scalar and Offset methods by selecting the background and the core of the galaxy.
For the red and green filters, the image with the brightest galaxy core
was used for the reference image. To show the potential for color
change, two image stacks were created with the blue data. One stack's
reference image was the one with the brightest galaxy core. The other
stack used the image with the dimmest galaxy core. |
|
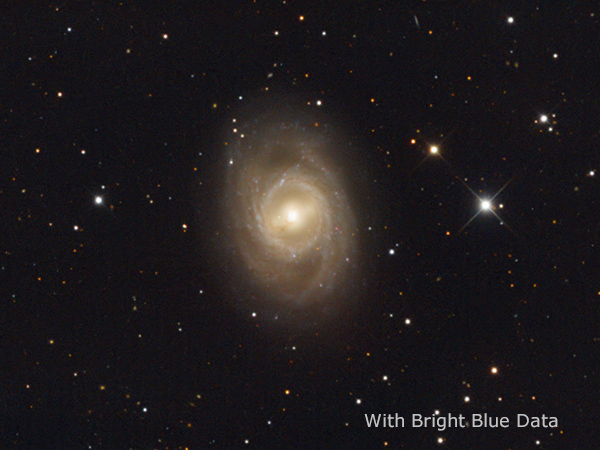
The following "mouse over"
image comparison shows how the color balance changes with the different
normalization for the two blue filter stacks. The dimmer normalization
reference image produced a final RGB result with a yellow bias. Both
images used RGB combine ratios of 1,1,1. The two images were processed
side-by-side with identical procedures. |

************************
|
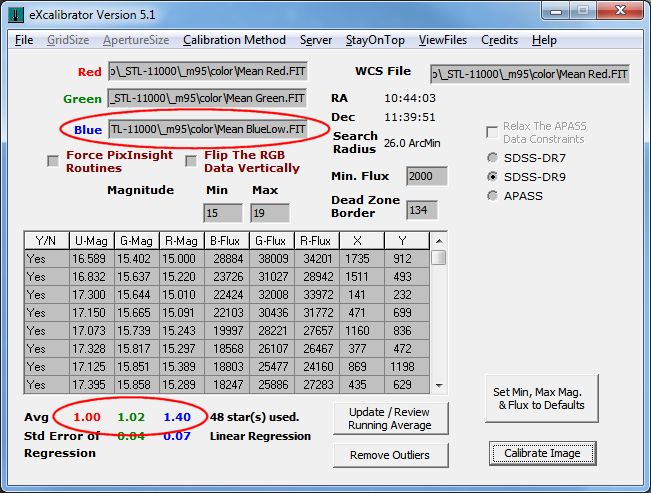
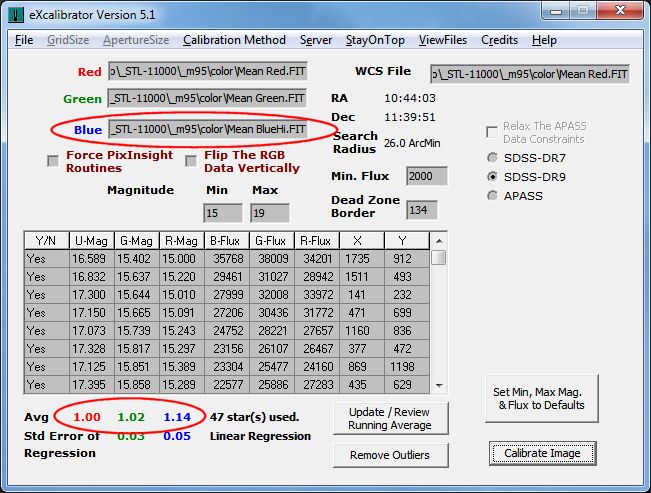
For the second part of the
test, both sets of R, G and B images were first processed with
eXcalibrator. The two results are shown below. The first screenshot is
with the dimmer blue normalization reference image. The second uses the
bright reference image. Note the difference in the circled RGB color
correction ratios. To compensate for the dimmer normalization, the value
for the blue channel is much higher in the first example. |


|
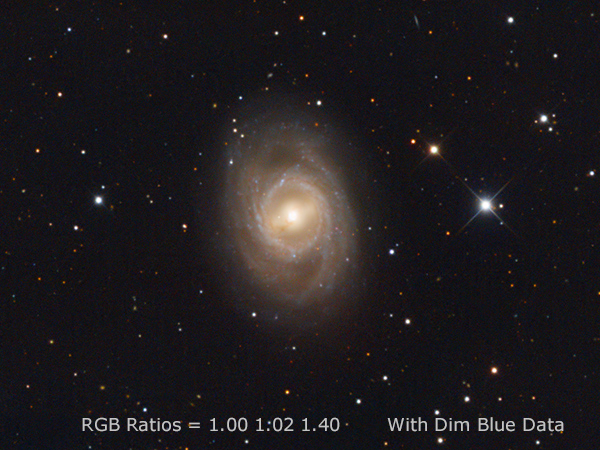
The two RGB
images, in the following "mouse over" comparison, were created with
CCDStack using the eXcalibrator RGB color correction ratios. The PixInsight processing was done side-by-side with identical
functions. Each processing instance was applied by dragging and dropping
it onto each image.
The final images look identical and the differences in their histograms
are barely visible. This shows that eXcalibrator corrects the color
balance for improper normalization choices. A poor choice for the
normalization reference image may produce a final image with a reduced
signal-to-noise ratio. However, eXcalibrator maintains proper color
balance. |

|
Image
Acquisition and Processing Details
RGB 900 min (20 x 15 min. each filter) Bin 2x2 eXcalibrator for color balance calculations.
CCDStack:
Sub exposure calibration, registration, data rejection, mean combining
and RGB creation.
PixInsight:
Gradient removal with DynamicBackgroundExtraction, ACDNR
for noise reduction, nonlinear stretching with HistogramTransformation
and color saturation. Finally, the background was tweaked to a neutral
gray by aligning the three color channels with HistogramTransformation.
PhotoShop:
For adding text to the images and saving JPEGs for the web. |
|